How to Make Straight Hair Wavy
The grass is always greener, right? Those with straight hair want curls, those with curly hair want straight strands… we want what we haven’t got.
But there’s no reason why straight-haired folks can’t live on both sides of the fence, and here are some ways – both with and without heat – to make some waves.
Preparations
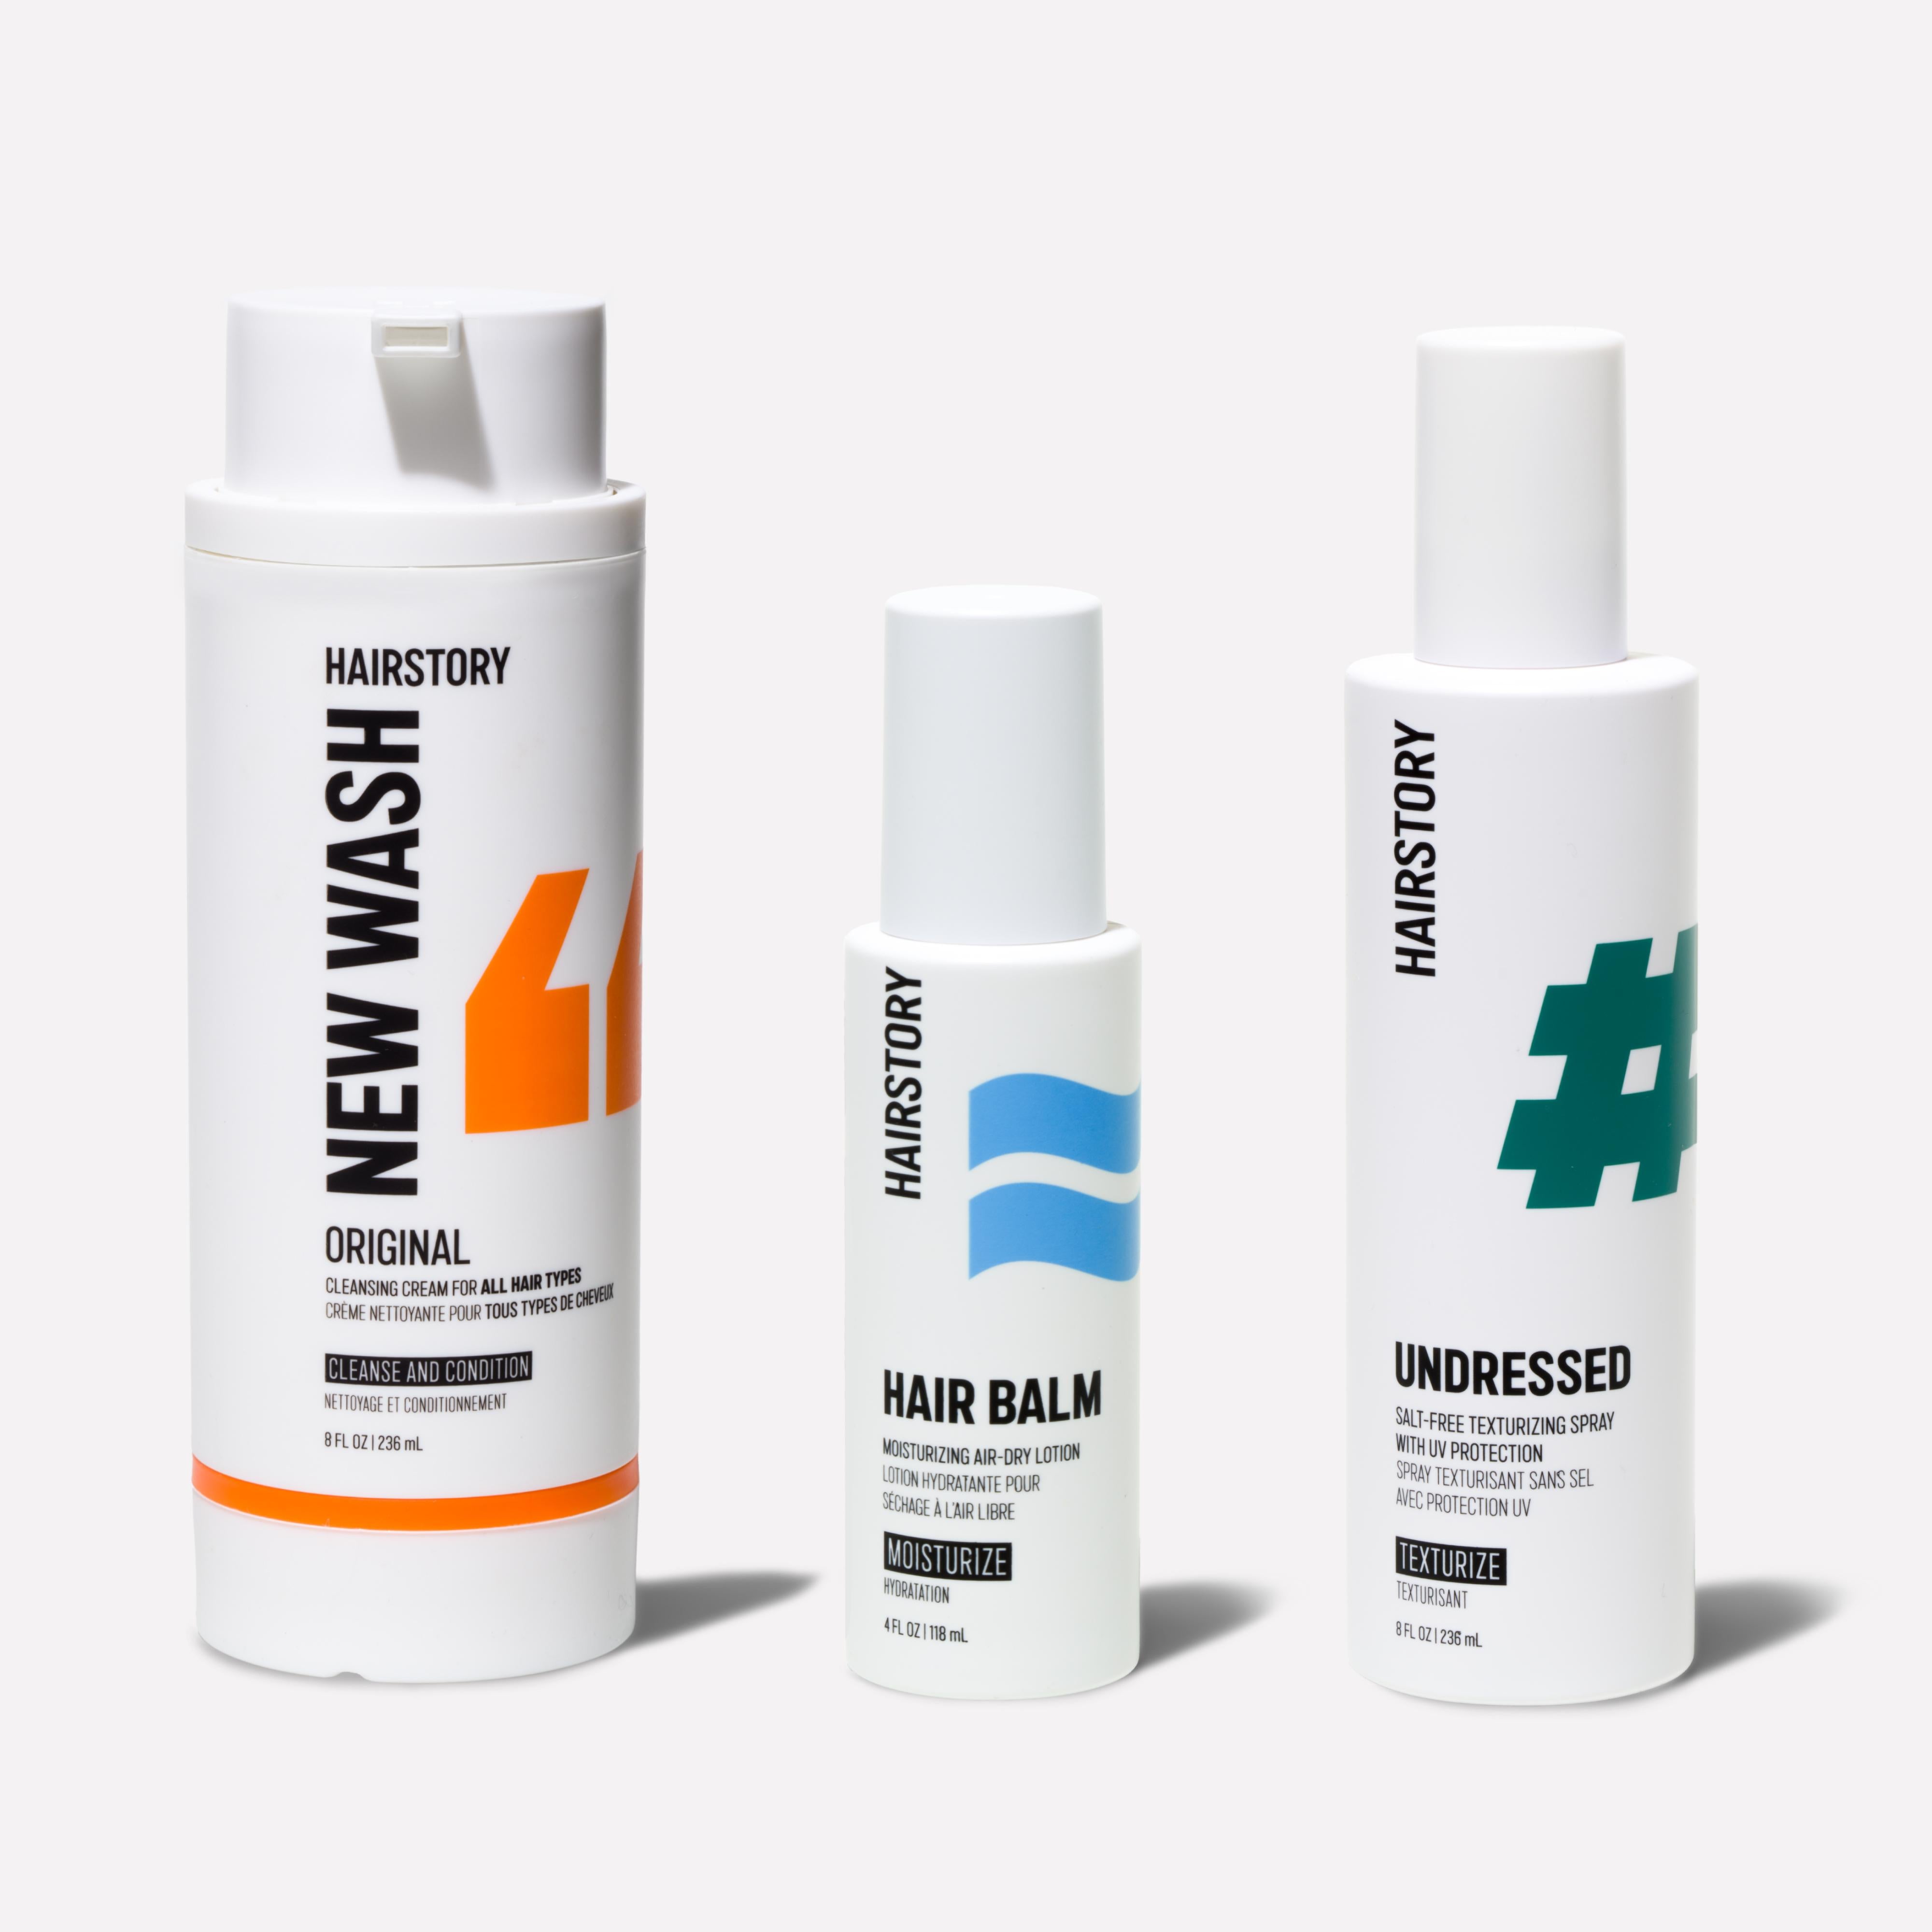
But first, some preparation: styling products are key to changing the shape of your strands, and that includes those that you use in the shower. If you’re using a conditioner that’s too heavy, your hair is likely to fall flat faster after curling. Choose a light formula, and use it mainly on the typically drier ends. Better yet, try a detergent-free shampoo that does the work of both shampoo and conditioner.
Why Second-Day Hair Holds Waves Better
Less-than-clean hair will hold the curled shape better. Clean hair is more slippery and glassy, making it harder to manipulate. In any case, know how to clean a hair brush so that your styling tools don’t gunk up your hair. You want grip, not slip, and your natural oils will act as a styling product of sorts. If you’re wondering how to turn straight hair wavy, starting with slightly unwashed hair can make a big difference. However, if you’re using a curling iron, you’ll need a good heat-protectant to insulate hair with the added benefit of helping set and hold the shape you give it.
How to Curl Straight Hair With a Curling Iron
Choose the Right Curling Iron
The tighter you curl your hair, the more likely it is to hold a wave. Your curls will naturally relax into waves over time, so choose a curling iron barrel slightly smaller than the wave size you're aiming for. For tighter, more defined waves, try a 3/4-inch barrel, while a 1.5-inch barrel is perfect for loose, beachy waves. This technique helps if you're wondering how to get wavy hair with straight hair using a curling iron.
Start by evenly coating damp hair with your protectant, and roughly blowdry. You can lightly run a little more hair product through your strands before you start curling.
Curling Technique
It may take more time, but working with smaller sections will better define the curl and allow for even distribution of heat. Start with your lower layers and gradually work yourself up by section. Twist a group of hair around the curling iron barrel. Remember, if you are wanting a beachy wave, it does not need to be perfectly coiled around the barrel. For a more effortless, natural look, leave the ends of your hair out of the curling iron instead of curling them all the way to the tip. Keep moving your hair around a bit to avoid clamp marks.
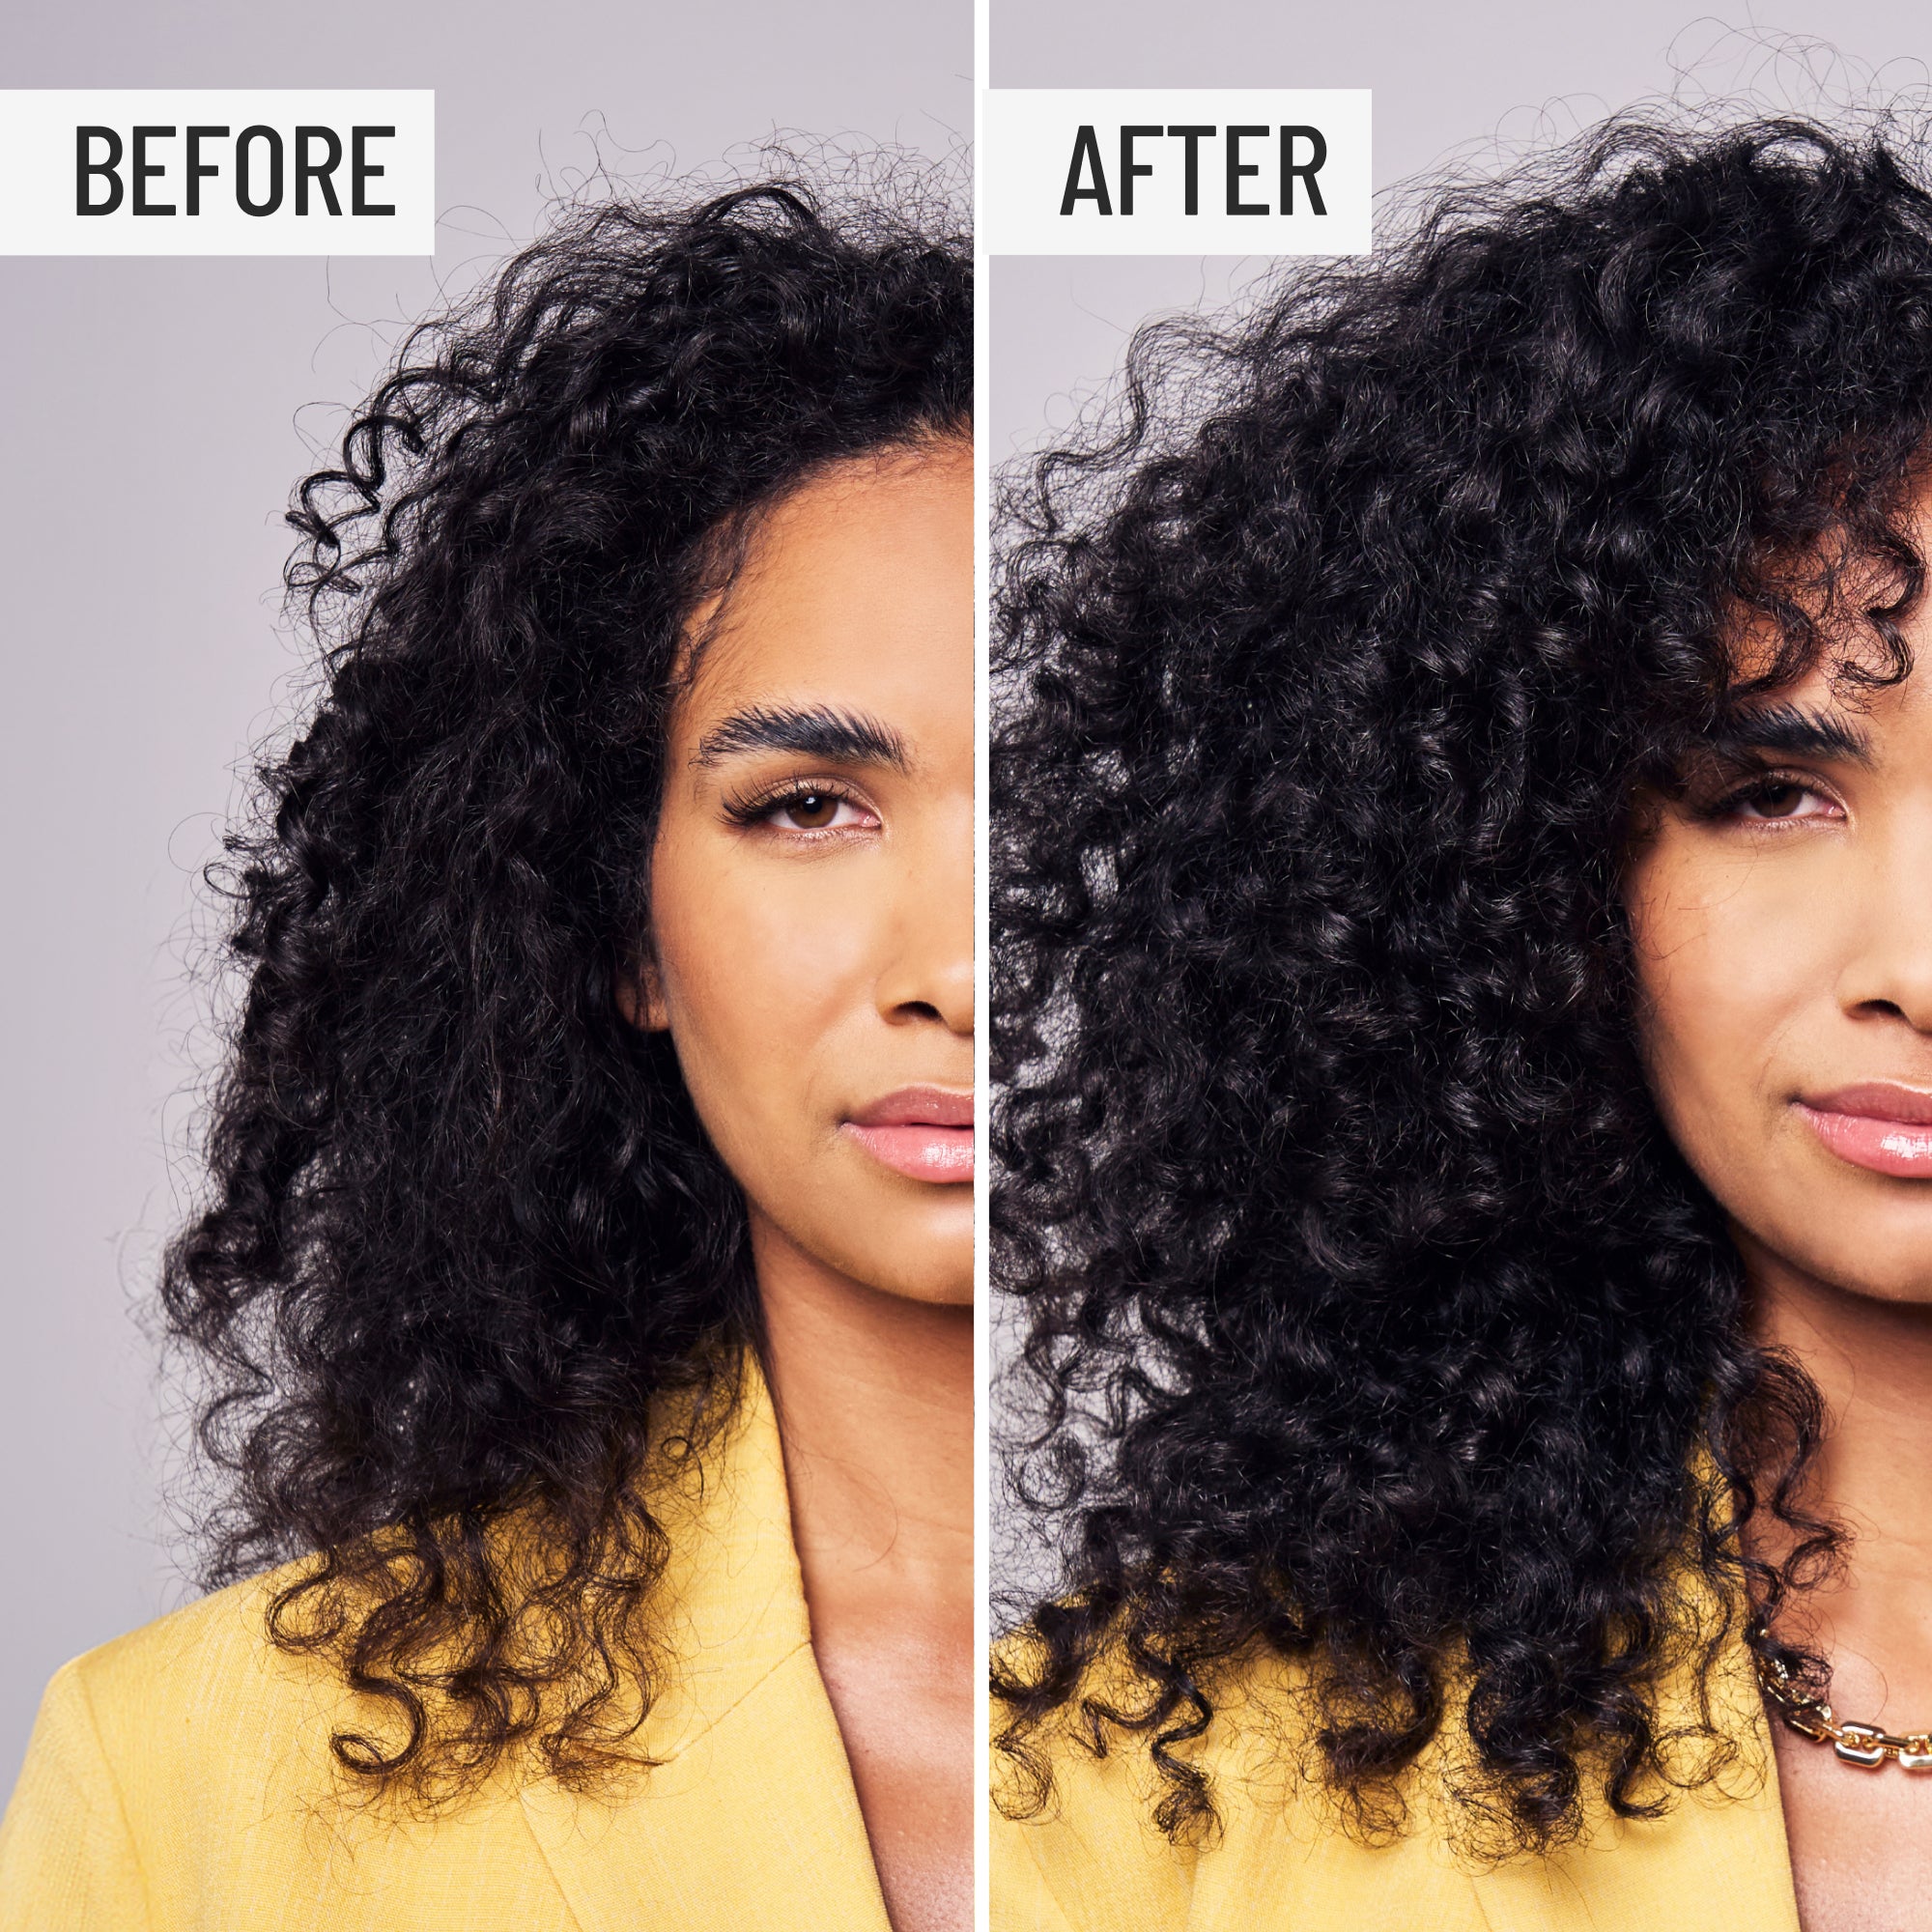
Once your waves are fully cooled, apply a light, even layer of flexible-hold hairspray to keep them in place without making them crunchy. Depending on how loose you want your waves, flip your head upside down and shake them out, or gently finger-comb to blend the texture. If you're wondering how to make my straight hair wavy and natural-looking, this final step is key. For looser waves, use a clean brush to avoid transferring dirt or oil to your freshly styled hair.
If you prefer not to use heat, don’t worry! There are plenty of heatless techniques to create beautiful, soft waves without compromising your hair’s health.
How to Make Straight Hair Curly Without Heat
Just as there are ways to know how to straighten hair without heat, it’s possible to achieve wavy hair sans curling iron. These methods create soft, natural-looking waves without exposing your hair to the damage caused by frequent heat styling. Heatless techniques are not only better for preventing damage but are also perfect for achieving more natural, softer waves. They’re especially ideal for busy routines, as many can be done overnight with minimal effort. And if you have hair extensions, these methods are a must to avoid heat damage. Find out more about how hair extensions work here.
Braids:
If you want a wavy hairstyle with minimum effort, braid your hair before going to bed and sleep with the braids in. For looser waves, create two large braids. For tighter, more defined waves, opt for four or more smaller braids. When you wake up, take the braids out and apply a little bit of hair oil to calm any frizz. Just make sure you braid the very tips too or tuck them in so they’ll be wavy as well. Pro tip: Use a satin pillowcase while sleeping to reduce friction, preventing frizz and breakage overnight.
Headband:
Take a headband that encircles your entire head and use a texturizing product like Hairstory’s Undressed to help hold the waves and add texture. The headband method is an easy way to achieve natural straight wavy hair. Apply Undressed to slightly damp hair to enhance wave formation. Place the headband around your head hippie-style and twist sections of hair around it. Leave it overnight or until completely dry. In the morning, unwrap your hair and gently fluff it with your fingers for soft, effortless waves.
Knots:
Use your styling product, like Undressed, to twist sections of your hair and twirl them into little buns. Pin them up and let them dry for at least six hours. For tighter, more defined waves, create several smaller buns around your head. For looser waves, opt for just two low buns. Once undone, spritz a light mist of Undressed to enhance your waves with weightless hold and a touchable texture. This technique not only helps you turn straight hair wavy but also protects against UV rays and avoids the dryness often caused by traditional sea salt sprays. Even when you’re not trying to achieve waves, buns are a classic style for any hair type, even if very fine. Knowing how to do a messy bun with thin hair is an art but gets easier with practice!
Pin curls:
Prep your hair as above, and comb sections from roots to ends to ease out tangles. For tighter waves, create smaller pin curls. For looser, more relaxed waves, roll larger sections of hair into bigger pin curls. Secure each curl with a hair clip or pin, or use a rag-rolling technique by attaching small strips of fabric and tying up the curls. For best results, consider sleeping with a silk scarf or bonnet to keep the pin curls in place overnight while minimizing frizz and breakage. Once your hair is completely dry, remove the pins and gently run your fingers through your hair or use a wide-tooth comb to break the tight curls apart into nice, loose waves. Finish with a light hairspray or finishing spray to help the waves last longer.